Using colored tiles in the classroom doesn’t have to mean “put out a bin of tiles and see what happens.” These colorful squares are often overlooked, but they’re full of potential when paired with intentional, hands-on tasks.
Looking for a fresh way to teach word families that actually sticks with your students?
You're not alone.
When taught strategically, word families offer a powerful way to build decoding fluency and strengthen phonics instruction. Word families have always been a go-to for building early reading skills, but how we teach and display them might need a little update.
As more classrooms shift toward Science of Reading-informed practices, it’s time to reframe how we teach word families. We can integrate routines that are interactive, engaging, and grounded in research-based instruction. Here's exactly how I teach word families using a hands-on approach that actually sticks.
Tired of using the same old patterning worksheets year after year?
If you're looking for a more engaging way to teach patterns in your primary classroom, you're in the right place. Worksheets can get the job done, but often leave kids disengaged and don't always reflect true understanding. Let's explore more meaningful, active ways to teach patterning in first grade or even in Kindergarten. Activities that are fun, interactive, and rooted in real-world exploration.
How do you start each day in your classroom? Morning work is a popular approach, but there are differing views of what morning work should look like. Hands-on learning is best, especially with math morning tubs that my students beg to use each morning.
The holidays are just around the corner, and your classroom is probably getting a little hectic. One of the easiest ways to keep kids focused and excited about writing in December is by using a Christmas writing center. Over the years, I’ve found that this simple shift not only streamlines my writing block but also boosts my students’ motivation, especially those reluctant writers who suddenly can’t wait to pick up a pencil.
Going back to school after a break is always hard, but it is especially hard after a longer break like Christmas Break or Winter Break. If you approach the first day back with the right attitude, you will find that you and your students are ready to get back on track. Here are a few tips to ensure that that smooth transition happens in your classroom.
It happens every day. We all have 5 minutes here and there during our day in the classroom that we need to fill, and we want to find meaningful ways to fill that 5 minutes. We want to make the most of those minutes, so it is important to find activities that are both educational and quick. I am here to help!
Thanksgiving is the perfect time to blend gratitude, literacy, and creativity in your primary classroom. Whether you're looking for a fun turkey card, a disguise a turkey craft and writing activity, or a high-interest read-aloud, this post has you covered. These activities are low-prep, highly engaging, and ideal for Kindergarten through 2nd grade.
Do you use a Word Wall? I think that a Word Wall is an essential part of a primary classroom and WELL worth the wall space that it takes up. There has been a lot of debate in recent years about the merits of a Word Wall. I feel strongly that it is a necessity, but I also feel strongly that it is only beneficial if you TEACH kids how to use it.
Are your student's struggling to learn their sight words? Would you like an easy to use system with those student's that targets just the words that they need? I am blogging over at Who's Who and Who's New and sharing about how I use my free Word Wall Words flip books to do just this. You can read all about it by clicking here:
I am super excited to be blogging tonight. You may have seen my posts on Facebook, Twitter or Instagram and made your way here, so welcome. Stick around to hear all about something I dreamed up to do with my students in response to our work with The Snowy Day by Ezra Jack Keats.
Introducing the Snowball Saver! What is a snowball saver? Well, we have spent the last two weeks working with the book The Snowy Day. As you will know, near the end of the story Peter's snowball melts, after he leaves it in his coat pocket. My first graders giggled and said that Peter was really silly to put it in his pocket. This lead to a discussion about what he could have done instead. There were lots of suggestions that he should have put it in the freezer.
This got me thinking about how to turn this wondering from my students into a challenge we could work on. We spent some time talking about how we could keep a snowball in our classroom. Could we make something to store it in? My students paired up and started brainstorming what they could make or build. Some of their ideas were crazy and far fetched, like building a refrigerator and using concrete blocks to build a cold room in the classroom. I figured I needed to help them be slightly more realistic in their thinking. To do this we watched a great little video about making a "keep a cube" container, which is essentially the same thing. Here is the link to the video on Youtube:
This got them moving in the right direction. I sent home a note to families with a few suggestions that most of the students came up with and then they added items to the list if there were other things they needed from home. This ensured we had a good selection of found materials to build with.
This morning I set out the collection I brought in. I knew some would forget and some would not have anything to contribute. Many children did contribute the class collection and we ended up with many more materials with which to build.
We gathered on the carpet and I went over the steps we were going to follow in order to be real scientists investing the problem or challenge: Can you keep a snowball from melting in our classroom? The first thing partners did was gather their materials and make a materials list.
Once partners were done with planning out their Snowball Savers they got to work creating it. This part was fun but very messy. There was paper, foil and lots of other random things everywhere, but everyone was engaged and they were having a blast.
Now that the Snowball Saver was ready it was time for the snowball. Up until this point the snowballs were all sitting in a cooler outside staying cold. Before they were able to put them inside their Snowball Saver, they needed to measure the diameter of their snowball so they had something to reference at the end, if the snowball did not melt. They loved handling the cold snowballs and were very gentle so that they did not break apart.
As soon as students got their snowballs I put our "control" snowball in a dish in the classroom. We needed to see how fast it melted out in the open in order to compare to our protected snowballs.
After the snowballs were safely tucked away it was time to draw a labeled diagram of the Snowball Saver. Next, partners wrote the steps they followed in order to build their Snowball Saver, just like a real scientist.
This process took us all morning. Two hours after we started we took a look at our "control" snowball and it was almost melted, so it was time to check on our Snowball Savers. The results might surprise you! The results certainly surprised them.
Almost all of the snowballs were still intact and only a few had started to really melt. We decided if there was water in the container or on the wrap that they used around it then it was melting. They were totally blown away by the results. Only 1 of the Snowball Savers had a fully melted snowball.
This is the one that showed no signs of melting. It generated a lot of conversation as did the ones where the snowball was wrapped up with multiple layers of things like waxed paper, plastic wrap, newspaper, tinfoil etc. Why did the snowball in a styrofoam container not melt at all? How about the ones wrapped in of layers? Lots of great questions were asked.
I deem this project a total success. It incorporated so many aspects of the curriculum and generated amazing conversation with the students. It touched on the following curriculum areas:
~ measurement
~ 3D Shapes
~ Science - matter/materials/fasteners
~ Science - structures
~ Writing - writing How to, creating a labeled picture or diagram, sequencing.
Another possibility to link it to Oral Communication would be to interview students and have them explain their choices and why they think that their Snowball Saver will keep the snowball from melting.
I hope you enjoyed this peek into my room at my first STEM inquiry. This is now available in my store. Click on any of the pictures to be taken to my store.
I would love to hear your thoughts on this project. Please comment below. Thanks so much for stopping by.
Thanks for stopping by! I have a lot going on in the classroom right now and I am having a hard time getting inspiration to blog. Tonight it struck me that I should just keep it simple and talk about what we have been doing during our Graphing unit lately. Get ready for a practical post!
Graphing is a skill that usually comes fairly quickly for students. They work on it a lot in Kindergarten. When teaching it I always start with concrete graphs - we make graphs with ourselves which the kids love! We look at our clothing, our hair, our shoes etc and sort ourselves out and make a graph using the tiles on the floor as the spaces to stand on. Next, we pull out the math manipulatives and start making concrete graphs at the tables. I like to use a ruler as a 'starting line' so that students can clearly see where the objects go.
Collecting primary data is another skill that requires a lot of practice and I do a lot of whole group work around that skill to prepare them for asking their own questions and conducting a survey. I like to make the surveys applicable to our classroom lives so students see the real reason for doing this in real life. Recently, we maxed out our champ on Go Noodle (we love that site) and needed to choose a new champ. This was a great opportunity to conduct a survey.
After lots of whole group opportunities I introduced centers for independent practice. During this time I work with one group of students while the others are working at their centers. We always spend a day exploring the centers beforehand to make sure that "most" students can be independent. I try to ensure there is at least 1 "teacher" who can help those who are stuck, in each group.
Graphing boxes are one of my centers. There is a collection of boxes filled with small items: erasers, beads, pom poms, gems etc. The Dollar Store is the perfect place to find things to add your graphing boxes. The students create the concrete graph with the objects and then translate that information into a bar graph or picture graph.
My Grab and Graph center is another center we use to practice making a concrete graph, then a bar graph. At the bottom there is opportunity to practice communicating about the graph to explain what the data tells. There is little reading to be done on the page so it makes it easier for your early readers and writers to complete with independence.
Grab and Graph Math Center
My Spin and Graph centers are also a big hit since they involve using dry erase markers. Everything is more fun with markers, according to my students. The worksheets for this center involves a bit more writing so it is perfect for those students that are ready to handle more writing. Some of my non-writers often draw the picture on the line to communicate their thinking.
Spin and Graph Match Center
Would you like to see what we did next? Head to the second installment of Get Your Graph On over {HERE}
Before you go I wanted to share with you a graphing freebie that we will be using in a few weeks on Valentine's Day. I love, love, love it! It really gets kids to slow down and look at their valentines. In the past I was disappointed in the way the kids rummaged through their cards in search of treats and other special things. Last year they contentedly looked through their cards, made judgements about what category worked best and completed their graph. It was a proud teacher moment. Click on the photo to head over to my store to download it.
It's back! Last year I started this Linky and I am back with the adventures of Snowflake again! Do you have a classroom elf? If so, then come and link up and share all about your elf antics! Grab this graphic to use and link back to this post.
Snowflake made his grand arrival on December 1st! Santa and I have talked about this and I told him there was no way I could have a messy, crazy elf in my classroom. He was kind enough to send us his most trustworthy and best behaved elf. Phew! I didn't think I could handle an elf who started our day off with crazy messes. Santa even sent a letter with Snowflake to introduce him to us:
.
This is how we found Snowflake on the 1st. He was sitting in his favourite spot in the room - up high where he can see everyone and not be worried about someone touching him!
The students were super excited to meet him. I was really hoping it was going help as we are starting to go a bit off the rails.
Wednesday we found him wrapping!
Snowflake wrapped up almost all of our Christmas books! He brought a letter from Santa to to remind everyone to try to be better listeners! Unfortunately it didn't really seem to help the ones who really needed the reminder.
This is one of my FAVOURITE Christmas in the classroom traditions. The kids were beyond excited and wanted to open them all right then and there. We counted to make sure that there was a present for everyone and sure enough there was. Now, when it is time to read a story, I use my random name chooser on my smartboard and the lucky student comes up to unwrap our story.
On Thursday Snowflake felt like he needed a better place to watch from and hung out in one of balls hanging from the ceiling. He felt really safe there! The kids are loving talking to him but he is not working his magic like he did with my class this year. My class is super chatty and are really struggling to listen during lessons. I might need to amp things up next week!
This was also the second day of our Elf Journal. I love this freebie from Positively Teaching called Elf Antics! She designed the pages to be super simple with just a little drawing spot. I assembled the journals and each day the students find Snowflake and write about what he is doing. They were pretty excited when I told them that they were taking the journal home when they left for Christmas #itsthelittlethings.
Today we also got started on one of my favourite craftivities which goes along with a Christmas poem I wrote that we are learning - Santa's Stuck! We are working on it for our school Christmas concert in a few weeks. You can find the poem by clicking {HERE} or the image below.
Our last Snowflake sighting this week found him reading with our class mascot Ellie, Santa, Hippo and some of the reading buddies. He was enjoying the book we opened on the day before, Pete the Cat Saves Christmas. He loves to read just as much as I do!
Today we worked on a craftivity to go with our Santa's Stuck poem. This is such a cute story. We have a battered copy in our library and I guard it with my life as I have not seen it anywhere else and can't find a copy to buy. I absolutely the love the ideas they come up with to free Santa from the chimney.
Love their creativity!
Are you ready to link up. Click below to add your own post about your classroom elf. I will be back next Friday night with another link up!
Guided reading is an essential part of your reading time. However, it is usually a small chunk of time each day, so you need to make the most of it and engage your students during guided reading. So how do you do that? I will share with you 3 things you should have at your guided reading table to make your time run smoothly and help keep your students engaged during guided reading instruction.
What is at my Guided Reading Table?
1. Tools to teach decoding strategies
First grade readers are decoders in their purest form. They have learned that to read, they need to sound words out. Once they have learned their letter sounds, they are good to go, or so they think. If you ask a first grader how to solve an unknown word, they will say “sound it out” every time. We need to teach them that there are lots of other ways to figure out tricky words.
I do this by introducing them to the decoding strategies and the stuffed animals that go with each. I created a set of Decoding Strategies Posters with animals to teach each strategy. They are immediately hooked when the stuffed animals come down to the reading table as I model how to use a strategy. For instance, when I introduce Stretchy Snake, we actually take turns coiling him up and stretching him out as we stretch out words.
However, it is not practical to keep Stretchy Snake there at all times, so I created a few student tools to go with the posters on the wall behind our guided reading table. When working on a particular strategy, I give students the decoding wand with the character on it. Click on any of the pictures below to get a closer look at the resource.
This acts as a reference to try that strategy when they come to an unknown word. Later on, students can use a bookmark, which includes all the strategies, when they are more confident readers and have learned some strategies to try when decoding.
I teach the decoding strategies in approximately the same order every year ~ Eagle Eye, Stretchy Snake, Chunky Monkey, Lips the Fish, Skippy Frog, Flippy the Dolphin and lastly, Tryin' Lion.
2. Tools to teach reading comprehension
When it comes to teaching comprehension skills, I have a confession to make. Many times I struggled to figure out what exactly to ask my students or how to word it. We do not use a particular reading series, so I glean resources from many places.
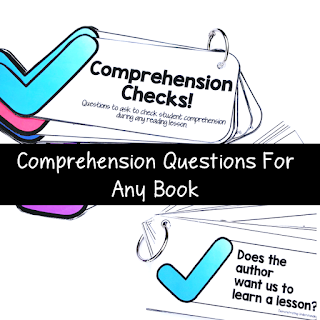
Identifying key comprehension questions for text was sometimes a bit difficult. That is why I decided to make myself a go-to resource for any non-fiction text that covered all the different comprehension strategies that I teach. Enter Comprehension Checks! These question cards are placed on a ring, and I keep them at my guided reading table and another set at our carpet area to use during shared reading.
The Comprehension Checks are colour-coded and organized by reading strategy. There are multiple questions for each strategy. On each card, you will find the question and then “look fors” – what you might expect your students to say or think to answer the question. This extra information makes the cards more teacher-friendly.
We are about to start our unit on story elements – Character/Setting/Problem/Solution. The Analyzing Text and Demonstrating Understanding cards will be close at hand during my guided and shared reading lessons. Here is a closer look at a Making Connections card:
3. Tools to teach phonemic awareness
This tool isn't necessarily aimed at teaching during guided reading, but it is an essential precursor to teaching reading. In first grade, at the beginning of the year, not all of your students will be ready for a traditional guided reading group. Instead, they need to develop foundational phonemic awareness skills to begin to decode and read the text. In this case, teachers do not need to provide their students with books and questions, but they need to be armed with word lists and lots of them.
I always start the year with at least a couple of groups who need to start here, and I wanted to keep them engaged too during their instruction. I created a set of word lists to practice whatever phonemic awareness skill I was working on. I pull out the colour-coded sets and have several different word lists for each skill, so I wasn't trying to generate word lists on the fly. We have all done that!
I hope you have found some new resources to make your guided reading time more effective and help engage your students during guided reading instruction.
Take a moment to pin this post so you can come back to it.


.png)