Hanging Around In Primary: teacher tips

Showing posts with label teacher tips. Show all posts

How to Teach Word Families in a Few EASY Steps

Originally published August 2017; substantially updated September 2026 by Christina Hermer, an experienced primary teacher.


Looking for a fresh way to teach word families that actually sticks with your students?


You’re not alone.


Word families have always been a go-to for building early reading skills, but how we teach them matters. When word-family instruction includes explicit sound work, word building, reading and spelling, students can use a familiar pattern to decode words instead of simply memorizing a list.


As more classrooms shift toward Science of Reading-informed practices, we can keep the interactive parts of word-family instruction while making the sound-to-print connection much clearer. Here’s how I teach word families using a hands-on routine that gets students involved at every step.


What Are Word Families and Why Do They Matter?


In early phonics instruction, a word family is a group of words that shares the same rime and spelling pattern. The rime begins with the vowel and includes the sounds that follow it. In map, for example, m is the onset and ap is the rime.


One pattern, three different words

map, cap, tap
Each word has a different beginning sound, but all three share the -ap rime and spelling pattern.


When students know the sounds represented by the letters, they can blend each word and then notice what stays the same. That shared pattern can make it easier to read and spell another word in the family.


The goal is not to have students memorize map, cap and tap as three unanalyzed whole words. We want them to look through the word, connect the letters to sounds and use the familiar pattern to support decoding.


You may also hear the term word family used for words that share a meaningful base, such as help, helper and helpful. That is a morphological word family. In this post, I am using word family to describe the phonics patterns we teach to beginning readers.


What Should Students Know Before Learning Word Families?


Before beginning a word-family lesson, take a quick look at the words you plan to use. Students will have more success if they already have some familiarity with:


  • The letter–sound correspondences used in the words
  • The target short-vowel sound
  • Hearing and blending individual phonemes
  • Segmenting a simple word into its sounds
  • Reading or building simple CVC words

What I do in my classroom

If I am introducing the -at family, I want students to be familiar with short a and the beginning consonants in the words we will build. We can then segment and blend cat as /c/ /a/ /t/ before comparing it with mat and sat.


Students do not need to have mastered every one of these skills before they begin, but they should not be meeting all of them for the first time in the same lesson. If blending or segmenting is still difficult, add a little more oral practice and use fewer words.


If you need help identifying those sound-based skills, this explanation of the difference between phonological and phonemic awareness is a helpful place to start.


What Order Should You Teach Word Families?


There is not one word-family list that every teacher needs to follow. The best order is the one that fits the phonics scope and sequence you already use. Word families should reinforce the letter–sound correspondences students have learned, not introduce a collection of unfamiliar spellings all at once.


  1. Follow your phonics program’s scope and sequence. Use word families to practise the sound-spelling relationships being taught.
  2. Choose families made from familiar correspondences. Check both the rime and the beginning sounds in the words you plan to build.
  3. Begin with simple, regular patterns. Short-vowel CVC families such as -at, -in and -op are easier starting points when the necessary sounds have been introduced.
  4. Add more complex patterns later. Save families containing digraphs, blends or less common spelling patterns until students have been taught those correspondences.

For example, after students have learned short a and the consonants m, s, c, p and t, you can build words such as mat, sat, cat, pat and tap. I would leave chat out until the ch digraph has been taught.


This keeps word-family work connected to systematic phonics instruction and allows students to use what they know to read each word.


Teaching Word Families: A Step-by-Step Routine


I use a simple routine that moves from sounds to print and then into reading and spelling. The steps can fit into your regular phonics block, small-group lesson or intervention time.


You do not need to teach a large list in one sitting. A few carefully chosen words give students enough practice to blend the sounds, compare the spellings and apply the pattern.


Here’s how it looks in my classroom.


Step 1: Introduce the Sound and Spelling Pattern


Begin by saying the target vowel sound and showing the spelling pattern. Have students repeat the sound and listen for it in a few words. Then draw attention to the rime you will be using, such as -at.


Keep this part brief and explicit. Students should know what sound they are listening for and which letters represent it before they begin building words.


Step 2: Map and Blend the Individual Sounds


Build the first word with letter cards or magnetic letters. Have students say each phoneme as you point to or move the letters, and then blend the sounds to read the whole word. This helps them connect the sounds they hear to the letters they see.


We sometimes add a simple movement routine to keep everyone involved:


  • Hold out one fist for the beginning sound.
  • Hold out the other fist for the rime.
  • Push the fists together while blending and saying the whole word.

The movement adds a little novelty, and yes, they will ask to do it again. I still make sure students attend to all of the sounds in the word before they notice the larger shared pattern.


Step 3: Build and Compare Words in the Family


Change one beginning sound at a time to build several words in the family. Students segment and blend each new word before adding it to the list. This is where they begin to see that one part changes while the rime and spelling pattern stay the same.


As you compare the words, ask:


  • What sound changed?
  • Which letter changed?
  • What part stayed the same?
  • How did the change affect the word?

Instead of filling out the anchor chart on my own, I have students help create it. They come up and add a word from the family after we have segmented, built and read it together. Because they contributed to the chart, they are much more likely to use it later.


A quick word-wall note: You do not need to ditch your word wall to teach word families. Build and blend the words together before displaying them, and continue to reference them during real reading and writing. The word-family chart and word wall can support one another.


Step 4: Read and Spell the Words


Once the words have been built, mix up the order and have students read them again. Changing the order matters because it keeps the activity from becoming a memorized chant.


Next, dictate one or two words for students to spell. Have them say the word, segment the sounds and write the letters that represent each sound. You can also ask them to spell a new word from the family that was not included on the chart.


Finish by reading or writing one of the words in a simple sentence. This helps students see that the goal is not just to complete a word list; it is to use the pattern while reading and spelling.


Step 5: Apply the Pattern in Reading, Writing and Centers


Return to the pattern during reading, writing and independent practice. Ask students to find a word with the target pattern in an appropriate text, use a word in a sentence or sort words by their spelling pattern.


Throughout the week, I include more word-family practice in literacy centers. Students sort, build, read and spell words independently based on the sound-spelling patterns we have already learned. This gives them extra practice without asking them to figure out an untaught pattern on their own.


After we have completed the major families for a short or long vowel, I sometimes use a wrap-up SCOOT activity. I place blank laminated posters around the room, and students work with a partner to rotate, build and record words. It is collaborative, fast-paced and gives me another chance to see which patterns need more review.


Students are involved throughout the routine. They are not just looking at a finished display; they are saying the sounds, moving the letters, building the words, reading them and using them. That involvement is what turns the poster into a classroom tool they understand how to use.


How Word Families Support Reading and Spelling


Word-family practice is most useful when students can transfer the pattern beyond the original chart. After teaching a family, I look for several kinds of application:


  • Reading the words after their order has been mixed
  • Reading a newly built word from the same family
  • Spelling a dictated word by segmenting its sounds
  • Spelling a new word that was not on the class chart
  • Reading the pattern in a sentence or appropriate connected text
  • Using a word from the family in their own writing
  • Returning to the pattern during later review

If students can recite a grouped list but have difficulty reading the same words in a different order or spelling a new example, the pattern has not transferred yet. That quick check tells me to return to word building, blending and sound-by-sound spelling before moving on.


Ready-to-Use Word Family Posters


If you want to use this routine without creating every chart from scratch, my Word Family Posters for Short Vowels and Long Vowels give you a consistent place to build and record the words with your students.


The bundle includes posters for short- and long-vowel word families with a simple design that keeps the focus on the words students are building. You can complete a poster together, laminate blank copies for partner practice or keep finished charts available for reading and writing.


The posters are not meant to replace your phonics curriculum. They give you a low-prep way to add the interactive building, blending and spelling practice described in this routine.


Word families still have a useful place in early phonics instruction. When students connect the shared spelling pattern to individual sounds and then apply it in reading and writing, they are doing much more than memorizing a list—they are learning how words work.


1

Engaging Patterning Activities for First Grade: No Worksheets Needed

Tired of using the same old patterning worksheets year after year?

If you're looking for a more engaging way to teach patterns in your primary classroom, you're in the right place. Worksheets can get the job done, but often leave kids disengaged and don't always reflect true understanding. Let's explore more meaningful, active ways to teach patterning in first grade or even in Kindergarten.  Activities that are fun, interactive, and rooted in real-world exploration.

engaging patterning activities for first grade. No worksheets needed

0

Why You Need to Teach Sound Segmentation and the Best Way To Do It

Phonemic awareness is one of the most important skills you will teach your students. It is the ability to identify and manipulate individual sounds in words, a key component of the science of reading.

One specific aspect of phonemic awareness is sound segmentation: the ability to break words down into their individual sounds, or phonemes. This post will explore the science behind sound segmentation and how you can teach sound segmentation effectively in your classroom.

why you need to teach sound segmentation and the best way to do it.

0

How to Build a Christmas Writing Center That Motivates Reluctant Writers

The holidays are just around the corner, and your classroom is probably getting a little hectic. One of the easiest ways to keep kids focused and excited about writing in December is by using a Christmas writing center. Over the years, I’ve found that this simple shift not only streamlines my writing block but also boosts my students’ motivation, especially those reluctant writers who suddenly can’t wait to pick up a pencil.

Elf on the Shelf sitting beside student writing samples in a classroom Christmas writing center with anchor chart words and a December writing prompt.
0

Want the Most Joyful Start to Every School Day? Try Morning Tubs!


Have you heard about Morning Tubs? How you start the day often sets the tone for the rest of your day. I've recently changed my thinking, begun to embrace a more relaxed, soft start to the day, and transitioned to using morning tubs or soft-start bins in my first-grade classroom. It's definitely made the start of the day more joyful for my students and me!

Looking for hands-on math ideas?  Check out this complete guide: Hands-On Math Activities for Primary Students

Read on to find out what the beginning of the day looks like with my first graders and how it got them excited about learning.

Morning tubs for first grade students – hands-on activities as an alternative to morning work

In my classroom, we are now starting most days with Morning Tubs.

5

Cheap Flexible Seating Ideas that Will Help You Get Started

Flexible Seating.  You have probably heard about it or seen it while scrolling through Instagram and seeing all those beautiful alternative seating options.  You are probably also thinking, "OMG, I can't afford THAT!", just like I was.  Well, you CAN start with flexible seating options in your classroom right away without a lot of money invested.  I am sharing how you can get started and 5 cheap, flexible seating options that you can try.

Have you wanted to try flexible seating in your classroom but don't what to spend a fortune?  This post will show you how to get started with flexible seating in your classroom using inexpensive items you may already have.  It also provides helpful tips about management strategies and an anchor chart to get started.

1

3 Tips to Ensure a Smooth Transition after a School Break

Going back to school after a break is always hard, but it is especially hard after a longer break like Christmas Break or Winter Break.  If you approach the first day back with the right attitude, you will find that you and your students are ready to get back on track.  Here are a few tips to ensure that that smooth transition happens in your classroom.

3 tips to make an easy transition back to school after a break.  Give students lots of time, let them talk and review and practice classroom routines.

0

5 Cheap & Easy Ways to Make the End of the School Year Memorable

It's the end of the school year.  You're tired, and you don't have money to spend on a big end-of-year celebration.  All is not lost!  Pick your head up off your cluttered desk and read on to find 5 cheap and easy ways that will give your students a memorable end of the year and won't cost you a fortune.
cheap and easy ways to make the end of the school year memorable for your students
I went looking for ideas, and Pinterest bombarded me with countdowns galore - with balloons, paper chains and more.  I am more of a last-week-of-school activities teacher or a last-day-of-school activities teacher. What about you?   

1

Honest Advice for Teachers


This is an open letter to those teachers who, like myself, have been teaching for a while and can see the end of their career coming.


Dear Teachers, 

I am here to share with you my insight after teaching for 22 years.  Perhaps you feel the same way as I do or perhaps you have a ways to go in your career.  Either way, I hope you gain something from this letter and leave a little more inspired and comfortable in your own teaching. 

teacher quotes

You have been teaching long enough to see trends come and go and then come back again. What is new to some you recognize as a re-packaging of something that was "new" earlier in your career. This is your opportunity to step up and share your knowledge and let people learn from your experiences. Resist the temptation to point out that this trend, whatever it may be, is old news.  Take the lead.

teacher quotes

You have been teaching long enough to also know that you don't need to jump on the bandwagon of every new thing that comes down the line.  You have experience on your side and "know" what works for kids.  If there is a choice, pick and choose what you know will work best for kids and quietly leave it at that.

teacher quotes

You have been teaching long enough to know there will also be others in your building ready to give you advice.   Perhaps it is the new teacher who is fresh from Teacher's College and wants to bring you up to speed on the "newest trends".  It might be the teacher down the hall who feels like they are an expert and feels the strong urge to let everyone know that.  Don't let this phase you.  You have been around for a while and know what you are doing.  Don't second guess yourself.  You are successful, you have made it this far in your career.   Don't let others make you believe otherwise.

teacher quotes

You have been teaching long enough to know that you can't do it all and hopefully have reached the stage in your career to accept that as the reality of teaching and LET IT GO!  You will see many teachers in your building totally overwhelmed by the need to be all things and do all things.  Reach out to them and speak from experience.  My advice is to focus on what you can do and do it really well while working on growing in other curriculum areas.  I for one feel like I am a very strong literacy teacher but know that I still have room for growth in science and social studies.  We continue to grow as educators throughout our entire career.  Embrace your strengths.

You have been teaching long enough that you can see that retirement date in the not so distant future. For me it is under 10 years now.  I have 22 years of teaching under my belt.  I believe that is quite an accomplishment.  As each new year dawns I hope you feel the same excitement of setting up your room and preparing for a new group of students.  I hope you continue to love coming to work each day and teaching and learning with your students.  You are at a point in your career when you can see the end but you are enjoying the ride until you get there.  Embrace the journey!


Click on any of the links below to visit the blog post about each of these other teachers. Chances are you'll be in one of these shoes sooner than you realize!
~An Open Letter to a New Teacher
~An Open Letter to the Teacher in the Prime of her Career
~An Open Letter to a Teacher in a Rut
~Open Letter to the Retired Teacher
3

How to Engage Your Students During Guided Reading Instruction


Guided reading is an essential part of your reading time.  However, it is usually a small chunk of time each day, so you need to make the most of it and engage your students during guided reading.  So how do you do that? I will share with you 3 things you should have at your guided reading table to make your time run smoothly and help keep your students engaged during guided reading instruction.  


What is at my Guided Reading Table?


1.  Tools to teach decoding strategies

decoding strategy posters are great reminders for kids when they are stuck on a a word.  Using characters helps students better remember strategies to try.


First grade readers are decoders in their purest form.  They have learned that to read, they need to sound words out. Once they have learned their letter sounds, they are good to go, or so they think.  If you ask a first grader how to solve an unknown word, they will say “sound it out” every time.  We need to teach them that there are lots of other ways to figure out tricky words.

I do this by introducing them to the decoding strategies and the stuffed animals that go with each.  I created a set of Decoding Strategies Posters with animals to teach each strategy.  They are immediately hooked when the stuffed animals come down to the reading table as I model how to use a strategy.  For instance, when I introduce Stretchy Snake, we actually take turns coiling him up and stretching him out as we stretch out words.

However, it is not practical to keep Stretchy Snake there at all times, so I created a few student tools to go with the posters on the wall behind our guided reading table.  When working on a particular strategy, I give students the decoding wand with the character on it.  Click on any of the pictures below to get a closer look at the resource.  

Decoding strategies are key for early readers.  Having a collection of resources that students can reference during a guided group and while working independently is important too.  Using bookmarks, wands and mini cards to supplement the posters help with learning.


This acts as a reference to try that strategy when they come to an unknown word.  Later on, students can use a bookmark, which includes all the strategies, when they are more confident readers and have learned some strategies to try when decoding.

decoding strategies bookmark, beanie baby decoding strategies

I teach the decoding strategies in approximately the same order every year ~ Eagle Eye, Stretchy Snake, Chunky Monkey, Lips the Fish, Skippy Frog, Flippy the Dolphin and lastly, Tryin' Lion.

2.  Tools to teach reading comprehension

these cards are the perfect go to resource during guided and shared reading so that you always have questions on hand

When it comes to teaching comprehension skills, I have a confession to make.  Many times I struggled to figure out what exactly to ask my students or how to word it.  We do not use a particular reading series, so I glean resources from many places.

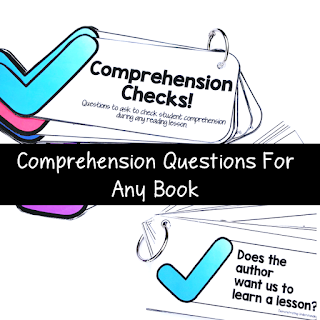
Identifying key comprehension questions for text was sometimes a bit difficult.  That is why I decided to make myself a go-to resource for any non-fiction text that covered all the different comprehension strategies that I teach.  Enter Comprehension Checks!  These question cards are placed on a ring, and I keep them at my guided reading table and another set at our carpet area to use during shared reading.  

these cards are the perfect go to resource during guided and shared reading so that you always have questions on hand

The Comprehension Checks are colour-coded and organized by reading strategy.  There are multiple questions for each strategy.  On each card, you will find the question and then “look fors” – what you might expect your students to say or think to answer the question.  This extra information makes the cards more teacher-friendly.

these cards are the perfect go to resource during guided and shared reading so that you always have questions on hand

We are about to start our unit on story elements – Character/Setting/Problem/Solution.  The Analyzing Text and Demonstrating Understanding cards will be close at hand during my guided and shared reading lessons.  Here is a closer look at a Making Connections card:

these cards are the perfect go to resource during guided and shared reading so that you always have questions on hand

3.  Tools to teach phonemic awareness

This tool isn't necessarily aimed at teaching during guided reading, but it is an essential precursor to teaching reading. In first grade, at the beginning of the year, not all of your students will be ready for a traditional guided reading group.  Instead, they need to develop foundational phonemic awareness skills to begin to decode and read the text.  In this case, teachers do not need to provide their students with books and questions, but they need to be armed with word lists and lots of them.  

practice phonemic awareness skills such as segmenting, blending, rhyming and syllables with these word lists


I always start the year with at least a couple of groups who need to start here, and I wanted to keep them engaged too during their instruction.  I created a set of word lists to practice whatever phonemic awareness skill I was working on.  I pull out the colour-coded sets and have several different word lists for each skill, so I wasn't trying to generate word lists on the fly.  We have all done that!  

use phonemic awareness word lists to practice skills like syllables, rhyming, segmenting and blending.


I hope you have found some new resources to make your guided reading time more effective and help engage your students during guided reading instruction.

Take a moment to pin this post so you can come back to it.

Need help teaching guided reading? This blog post provides many useful guided reading activities and strategies to use during guided reading. These resources will help you make the most of your time at the guided reading table. #guidedreading #guidedreadingfirstgrade

Until next time,

2

Celebrating Halloween in the Classroom? Keep it Simple!

Halloween in the classroom can be a CrAzY time, so I am so glad you stopped by. I will be sharing a few helpful ideas and FREEBIES to help with your Halloween celebrations in the classroom.


My best advice is to KEEP IT SIMPLE!

In my experience in First Grade, it is best to celebrate within your predictable routine. We already know our children are beside themselves with excitement. By enjoying fun Halloween activities in the regular structure of the day, your students get to celebrate, but things are less likely to slip over the edge into chaos!

A Literacy Center perfect for the week before Hallowe'en! 

The week of or before Halloween, I intentionally choose word wall words with the "oo" sound so I can review the two sounds these letters make. I use this quick little activity in my centers for the week. Just sign up below to grab the FREEBIE!

Practice the OO sound with this FREE clip card set for OO as in Boo and OO as in book


Next up, some Halloween Art, with a bit of math thrown in! 

Who doesn't love to do Halloween Art projects! We created paint chip Frankenstein's using green paint chips from the hardware store! The students love this one, so I will do this craft every year. This is a great low-cost craft that really showcases each student's creativity.

All you need is: 

  • Paint chips from the paint store. I have used 3 and 4 colour paint chips.
  • Scrap paper is used to make the eyes, teeth, and bolts.
  • A sharpie to add stitches.  


Make a Frankenstein using a a paint chip and construction paper

A fun math activity we did as a tie-in was to count the "stitches" on Frankenstein's face to see how many he had. Before making the stitches, we talked about how stitches look like tally marks to 5. After finishing, they skipped counted the stitches to see how many Frankenstein had. 

I have several Halloween books that pair perfectly with this craft. One of my favourites is:

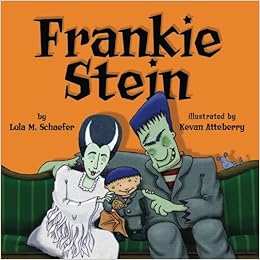
Image result for halloween book frankie


And finally, a Halloween Math Freebie for good measure!  

In math, we will use my Halloween patterning center this week to revisit patterning. As a special thank you for stopping by, you can grab this Math Center FREEBIE to use with your students. Students will look at each card, determine if it shows a pattern, and then place it on the sorting mat. I have also included a recording sheet so students can record their work as they go. Click on the picture to grab it.


Wait, There's More! 


Are you looking for ideas for your Literacy block for Halloween, too? I have you covered there as well. Check out this post for Halloween poems for sight words that are perfect for Kindergarten and first grade. 


Thanks for stopping by!  

17

The Best Way to Attach Name Tags to Student Desks

What is the best way to attach name tags?  

Let’s talk about something that quietly drives every elementary teacher a little bit nuts: student name tags that won’t stay put.
  
I laminate the name tags and attach them to the desk with heavy tape. The name tag looks great until that "one" student starts picking at the tape, and everyone else notices. Before you know it, everyone's name tag falls off their desk. Teacher nightmare!!!


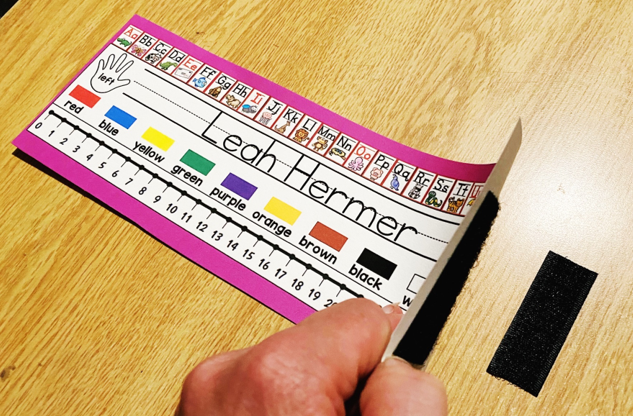
Use velcro to attach name tags to desks

I have tried ALL.THE.WAYS to attach my name tags:  

  • double-sided tape
  • packing tape
  • sticky tack

None of these methods has lasted long term. The kids picked at them, or the custodians had issues with them. 

I finally found a foolproof, time-saving, and reusable method to attach my name tags to desks that:

  • Kept them on all year
  • Made it easy for me to make desk switches without having to peel off a name tag
  • Don't get destroyed by little fingers picking! 

My answer is Velcro dots or strips! 


Use velcro strips for the best way to attach name tags

  • Print and laminate your name tags.
  • Stick the Velcro to the back (tip: put both pieces together so that when you turn the name tag over, the piece for the desk will be perfectly aligned).
  • Press down to ensure it sticks, and you are golden!   

Now you have name tags that stay put, can be swapped in seconds and don't leave a residue on the desk.  

You might be wondering:

Did students play with them? YES, they're kids after all. However, the novelty wore off quickly.  

Did the custodial staff have an issue with them? NO, they liked that they could be removed to clean under them. I often took them off once a week and put them in the center basket so the table would get cleaned underneath.  


Do you know something else that drove me crazy? 

Getting a student mid-year and not having a name tag for them!!! 

We've all run out of supplies like this and know the frustration. To compound that, our teacher supply store closed, so I created my name tags out of necessity. I designed exactly what I wanted and am so much happier with it.  

NO more commercial nametags! It's only custom nametags from now on! 

Some of the perks of a digital file name tag:
  • When a name tag looks worn, you can easily print a new one.
  • Do you often get a new student mid-year? No problem! Just print out a name tag for the student.
  • Write your students' names or type them into the editable file. 

Check out all of my Editable Student Name Tags or Name Plates HERE!  


editable name tags


So if you’re tired of peeling tape, wasted tags, and sticky desk battles, Velcro + editable, digital name tags might just be your new favourite teacher hack.

Got your own trick for attaching name tags to desks? Drop it in the comments! 

Until next time, 


11

3 Simple Classroom Management Tips You Can Try Tomorrow


Are you looking for tips to classroom management tips?  I have 3 simple tips for you that you can implement in your classroom tomorrow.  Read on to find out how to simplify your line ups, move more quietly through the halls and get your class to work as a team.  I am linking up with Mrs. McClain over at Buzzing with Mrs. McClain for her monthly You Oughta Know blog hop. Other bloggers and I will be sharing things that you “oughta know” for your classroom.


I don't know about you but some years my first graders return and they seem to have grown up so much over the two weeks. Some years however, I feel like I am back at square 1.  I want to share with you some of my management tricks to help them get back on track.

First off we often struggle at line up time - too many kids, too small an area (although I have a huge area this year, go figure!).  There is always arguing about who lines up where as well.  This year I whipped out my silhouette cutting machine and some vinyl and created girl/boy line up spots.  They work like a dream!  The kids just find a girl or boy circle to stand or, if they have the job of line leader, caboose, or door holders, they go to those special circles.  NO more fighting about spots in the line.  I have heard a lot about Sit Spots and I expect that they would work too. 


We struggle with moving through the hall quietly too.  This year I rarely have to take them to other places in the school but our French teacher takes them to her French room or the gym every day.  She loves this program.


Each time we line up to head into the hall I pick 1 boy and 1 girl popsicle stick and put them in my pocket.  I announce to the line that I have my two “hall stars” and will be watching to see if they are behaving as a Hall star should.   We do a quick review of our “Hall Stars” expectation poster before leaving.  On the way to our destination and back I keep my eye on my “hall stars”.  If they were successful I make a big deal about announcing their names and then write their name on the chart.  If a student wasn’t behaving properly then their name is returned to the “pick me” pocket and nothing more is said.  This really seems to encourage the kids to behave respectfully in the halls.  In my room if you are a Hall Star you get to clip up on our clip chart. 

This is available as a FREEBIE in my TPT store.  You can find it by clicking {HERE}.

http://www.teacherspayteachers.com/Product/Hall-Stars-A-Behavior-Management-System-1387222


My final tip today is all about getting the kids working together for a common reward.  I use Behavior Bingo in my room.  I use a clip chart for individual students but wanted a system to reward the whole class for appropriate behaviour. 


The month of December is so crazy that this little program takes  a back seat, so I pull it out fresh in January.  We review the ways we can work together to earn BINGO numbers.  The idea is that when the students are all following our classroom rules or expectations the class would earn a bingo number. 

Some ways they earn numbers are making their way to the carpet quickly and quietly, getting started quickly on a task or getting a class compliment, to name a few.  On a good day we may earn 2 or 3 BINGO numbers.  We are now entering Week 3 post holidays and our BINGO board is filling up more slowly than I would like it.  If you would like to give this a try it is available in my TPT store, you can find it {HERE}.


What are your favourite management tips for getting kids back into routine after the holidays.  I would love to hear from you with a comment below.  Now take a moment and hop to another blog to learn about something that you "oughta know"

Thanks for stopping by


12