Hanging Around In Primary: Back to School
Showing posts with label Back to School. Show all posts
Starting Bucket Filling? Here's What Actually Works
Have you ever tried something in your classroom that you wanted to be amazing, but it just... wasn’t? That was me the first time I tried teaching my first graders about bucket filling.
I loved the concept, encouraging kindness and helping students recognize the good in others Actually implementing it with my first graders was rough My students struggled with the writing component, the buckets were underused, and the idea fizzled out within weeks.
But I didn’t give up—and I’m so glad I didn’t Let me walk you through how I turned things around and implemented a bucket filler routine that made bucket filling a meaningful, year-long part of our classroom community.
No More Busy Work: Why Math Tubs Make the Best Early Finisher Activities
Every teacher knows this feeling. Your students finish early and look up at you, asking, “I’m done, what do I do now?” Early finisher activities can be tricky to manage, especially when the rest of the class is still working.
Too often, the quick fix is a coloring page, puzzle, or “read a book.” While these options keep students busy, they don’t actually build skills. That’s why Math Tubs are my favorite solution. They’re hands-on, skill-based, and engaging, turning early finisher time into meaningful learning.
The Best Home-School Communication Folder System for K–3 Teachers
Let’s be real: sending things home and getting them back in one piece is practically an Olympic sport for K–3 teachers. Whether it’s crumpled permission slips or mystery money floating around in the depths of a backpack, home-school communication can feel like a daily scavenger hunt.
After years of testing and failing, I finally found a communication system that actually works. Spoiler: It’s affordable and easy to implement, and I’m giving you a free set of editable labels to make setting it up easy.
Cheap Flexible Seating Ideas that Will Help You Get Started
Flexible Seating. You have probably heard about it or seen it while scrolling through Instagram and seeing all those beautiful alternative seating options. You are probably also thinking, "OMG, I can't afford THAT!", just like I was. Well, you CAN start with flexible seating options in your classroom right away without a lot of money invested. I am sharing how you can get started and 5 cheap, flexible seating options that you can try.
Classroom Reveal!
I'm {ALMOST} done classroom reveal.
I am so glad you stopped by to check out my Grade 1 classroom. I am happy to be joining Angie @ Lucky Little Learners and Ashley @ Schroeder Shenanigans in Second for a Classroom Reveal Link up.
I teach Grade One in Ontario, Canada and we start back much later than many of our American neighbors. Our first day is not until September 8th. When I joined the link up back in July it seemed like a great opportunity (and it is) until I realized that my room is rarely ready the Tuesday before I start back. Hence the {ALMOST} ready classroom reveal.
This is my bulletin board in the hallway that will greet my students. I am excited to be sitting at 17 students and hope that the numbers stick as we continue through this week of more possible registrations.
I took some pretty strategic pictures because there is still a lot of chaos in my classroom. I am the type of person who makes a big mess and jumps from job to job during my week of set up. It is a bit stressful! Today I was focused on the walls of my room and doing some more decor type things. These are the things I LOVE to work on. So without anymore explanation here are some pics of my space.
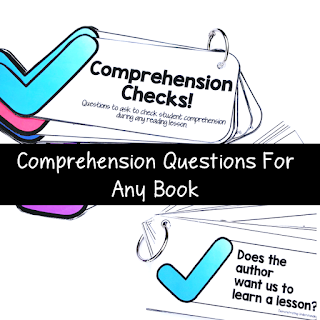
This is my Guide Reading/small group teaching area. There is a horseshoe table in front of this space but it was rather cluttered with stuff so I moved it out of the way! I love having everything I need right at hand - things like my reading phones and reading lights. The Reading Decoding strategies posters were updated this year and I am still on the hunt for an eagle to add to the collection of our decoding buddies. They sit at the table with us when we are learning about/practicing one of the strategies. I also have these posters as decoding wands that kids can use as well. I have to print them out yet! If you are interested in them just click on the picture to head to the product.
My kids love using these reading lights {AKA finger lights from the Dollar Store} while reading to track the print. They are incredibly motivating!
This is my coat area and entry. I am actually showing you last year's photo as I didn't have my tree ready yet with my new names.
I am blessed to be in a former Kindergarten space so I have my own washroom and a huge coat area. I love that we no longer need to make trips as a class to the washroom. That was not an enjoyable part of my day!
This storage area is in the main part of my classroom and is a bit of a catch all for organizing things. It's not the nicest set up but I am keeping it a little bit real and showing this too. I keep all my paper here and, as you can see, I do need to replenish the construction paper and card stock/colored paper on the top shelf. This is also the new home for my reading mats that the kids use for daily Read to Self. On the second bookcase I store all of my personal books. I have them organized by theme. I took the time to do this when I moved into this classroom. It has been a blessing. My next job is to make a list of all books in each bin so I know what I own. #ihaveabookobsession. I also have an extra crayons drawer organizer and a larger draw organizer for scrap paper. Both need updated labels. The rolling cart holds lots of needed supplies like markers, scissors etc.
This is my carpet area and the hub of our classroom. The shelf with the baskets holds our math/literacy centers and the bottom shelf holds student's individual book boxes for Read to Self. Our class mascot Ellie is hanging out on my stool. As you can see there are no books on the shelf yet - again {ALMOST} ready.
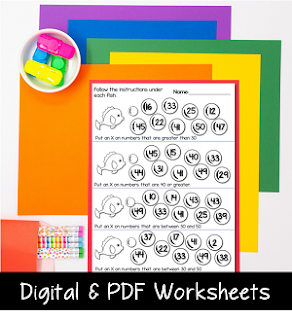
This is my Math word wall and subject focus area. Right now I have put up my backdrop for our first day pictures and set the frame there. I want to create a new sign to go on the frame. I have so many things to get done yet. I love my new number posters above the bulletin board. They have a rainbow border but it is hard to see in the picture. I love that it is going to make teaching skip counting by 10's easier. Having the 10 frame representation will be helpful too. Click on the picture to find it in my store.
This is my library. The top shelf is sorted by theme and genre. I am in need of a few new labels there. The bottom shelves houses my leveled library. I am grateful to have a well stocked library. Beside the shelf is our collection of reading buddies which are stored in my stools. I use these seats daily for my "stool stars" who are 2 students I randomly choose each day to have a special seating spot.
This is one of my favorite parts of my classroom. I love ...love...love the word wall. I am a firm believer in using it every single day. I also use a Word Jail - something else I firmly believe in. You can read more about the Word Jail {HERE} and {HERE}. If you are interested in checking out the the Word Jail product click on the picture. My new alphabet posters are above. The pictures on the alphabet posters match the pictures on the word wall headers so there is no confusion for the kids. They both also match the name tags I use too. You might have noticed some colored circles under certain letters on the word wall. My vowels are red and have a bright yellow circle behind them to help students located them quickly. I have placed a purple circle behind the digraphs to make those sounds easier to find too.
I hope you have enjoyed touring my classroom as it is right now. By Friday it will be fully ready for students. If I get a chance I may edit the blog post to add a few more pictures.
I am also going to link this post up with the team at Bloghoppin for Teacher Week and there Wednesday Classroom Tour.
My Best Back to School Resource!
Have you heard the news? Teachers Pay Teachers is holding it's annual Back to School sale on August 3rd and 4th. When you checkout, make sure you use the code BTS15 to save. I know my cart is ready!
I linked up with the the Wise Guys and I am so happy you have stopped by my blog to hear all about my Best (and favourite) Back to School Resource. If you follow me on Periscope you may already know about the product I am talking about: The Word Jail and my latest product The Overused Words Jail.
Let me start with the Word Jail. It is my pride and joy. I have been using it for years with great success with my first graders. This product targets those words that don't follow the spelling patterns we teach our children: words like of, because and could.
The idea is pretty simple: when you introduce
your new Word Wall words at the beginning of the week place any words that don't
follow the spelling rules you have taught your students into the Word Jail. I always
make a big production of putting the word in the "Jail". I also place
it in it's rightful spot on the Word Wall. Let me tell you, the kids LOVE putting
words in the Word Jail. The best part is that it works. My students are better able to read and spell those tricky words because I use the Word Jail to isolate those words and provide lots of opportunity for practice. You can read more about how I use it in more detail {HERE} and {HERE}.
As a companion to this bulletin board display I created a companion pack of Word Jail Worksheets. These printables offer practice for each of the Word Jail words included in the product. I have used them as morning work and during literacy centers. Each worksheet practices the skill of isolating
the proper spelling of the tricky word and crossing out the misspellings.
There is also practice in revising a sentence using the Word Jail word
and creating a new sentence using the Word Jail word.
These products are available on their own or in a money saving BUNDLE!
There is now a BRAND NEW product in my store that uses the same concept - The Overused Words Jail. Much like the Word Jail, which is an addition to the Word Wall, this display is a great addition to your Writing Bulletin Board. Place those overused words on your Overused Words Jail poster and students are encouraged to come up with better word choices to use in their writing instead. This product comes the poster, overused words cards, a mini lesson and finally 4 paragraph practice pages to work on the skills of identified overused words and replacing them with better word choices. Click on the image below to check it out!
I also want to highlight for you my best selling item. It is a craftivity pack to launch your addition and subtraction units in the early grades. Meet Gus the Plus and Linus the Minus!
These little characters are a big hit in my classroom. My students loved making them and they are a good visual reminder for students. This pack includes the craftivities, anchor charts, numberlines and printables. Click on the image to be taken to the bundle.
Thanks so much for stopping by. I hope you might have found some products that you will have a need for in your classroom.
The Best Way to Attach Name Tags to Student Desks
What is the best way to attach name tags?
Let’s talk about something that quietly drives every elementary teacher a little bit nuts: student name tags that won’t stay put.
I laminate the name tags and attach them to the desk with heavy tape. The name tag looks great until that "one" student starts picking at the tape, and everyone else notices. Before you know it, everyone's name tag falls off their desk. Teacher nightmare!!!
I have tried ALL.THE.WAYS to attach my name tags:
- double-sided tape
- packing tape
- sticky tack
None of these methods has lasted long term. The kids picked at them, or the custodians had issues with them.
I finally found a foolproof, time-saving, and reusable method to attach my name tags to desks that:
- Kept them on all year
- Made it easy for me to make desk switches without having to peel off a name tag
- Don't get destroyed by little fingers picking!
My answer is Velcro dots or strips!
- Print and laminate your name tags.
- Stick the Velcro to the back (tip: put both pieces together so that when you turn the name tag over, the piece for the desk will be perfectly aligned).
- Press down to ensure it sticks, and you are golden!
Now you have name tags that stay put, can be swapped in seconds and don't leave a residue on the desk.
You might be wondering:
Did students play with them? YES, they're kids after all. However, the novelty wore off quickly.
Did the custodial staff have an issue with them? NO, they liked that they could be removed to clean under them. I often took them off once a week and put them in the center basket so the table would get cleaned underneath.
Do you know something else that drove me crazy?
Getting a student mid-year and not having a name tag for them!!!
We've all run out of supplies like this and know the frustration. To compound that, our teacher supply store closed, so I created my name tags out of necessity. I designed exactly what I wanted and am so much happier with it.
NO more commercial nametags! It's only custom nametags from now on!
Some of the perks of a digital file name tag:
- When a name tag looks worn, you can easily print a new one.
- Do you often get a new student mid-year? No problem! Just print out a name tag for the student.
- Write your students' names or type them into the editable file.
Check out all of my Editable Student Name Tags or Name Plates HERE!
So if you’re tired of peeling tape, wasted tags, and sticky desk battles, Velcro + editable, digital name tags might just be your new favourite teacher hack.
Got your own trick for attaching name tags to desks? Drop it in the comments!
Until next time,
3 Simple Classroom Management Tips You Can Try Tomorrow
Are you looking for tips to classroom management tips? I have 3 simple tips for you that you can implement in your classroom tomorrow. Read on to find out how to simplify your line ups, move more quietly through the halls and get your class to work as a team. I am linking up with Mrs. McClain over at Buzzing with Mrs. McClain for her monthly You Oughta Know blog hop. Other bloggers and I will be sharing things that you “oughta know” for your classroom.
I don't know about you but some years my first graders return and they seem to have grown up so much over the two weeks. Some years however, I feel like I am back at square 1. I want to share with you some of my management tricks to help them get back on track.
First off we often struggle at line up time - too many kids, too small an area (although I have a huge area this year, go figure!). There is always arguing about who lines up where as well. This year I whipped out my silhouette cutting machine and some vinyl and created girl/boy line up spots. They work like a dream! The kids just find a girl or boy circle to stand or, if they have the job of line leader, caboose, or door holders, they go to those special circles. NO more fighting about spots in the line. I have heard a lot about Sit Spots and I expect that they would work too.
We struggle with moving through the hall quietly too. This year I rarely have to take them to other places in the school but our French teacher takes them to her French room or the gym every day. She loves this program.
This is available as a FREEBIE in my TPT store. You can find it by clicking {HERE}.
My final tip today is all about getting the kids working together for a common reward. I use Behavior Bingo in my room. I use a clip chart for individual students but wanted a system to reward the whole class for appropriate behaviour.
The month of December is so crazy that this little program takes a back seat, so I pull it out fresh in January. We review the ways we can work together to earn BINGO numbers. The idea is that when the students are all following our classroom rules or expectations the class would earn a bingo number.
Some ways they earn numbers are making their way to the carpet quickly and quietly, getting started quickly on a task or getting a class compliment, to name a few. On a good day we may earn 2 or 3 BINGO numbers. We are now entering Week 3 post holidays and our BINGO board is filling up more slowly than I would like it. If you would like to give this a try it is available in my TPT store, you can find it {HERE}.
What are your favourite management tips for getting kids back into routine after the holidays. I would love to hear from you with a comment below. Now take a moment and hop to another blog to learn about something that you "oughta know"
Thanks for stopping by
Subscribe to:
Comments (Atom)


.png)


